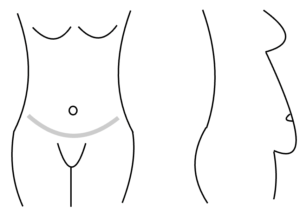
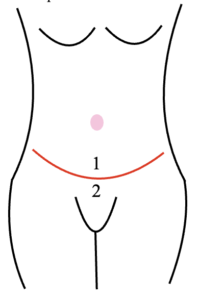
 Patients seeking tummy tuck surgery (abdominoplasty) often ask what type of tissue is removed during the procedure. While the specifics of abdominoplasty (such as the location of the tissue and the amount being removed) can vary based on the type of technique being utilized, tummy tuck surgery generally focuses on removing tissue below the belly button. This is especially so when the patient is undergoing a full, or traditional, tummy tuck. We invite you to explore the following images, which diagrammatically illustrate the anatomy of the typical patient prior to tummy tuck surgery.
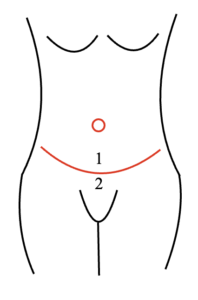
Firstly, the gray area in the left image represents the infra-umbilical fold. A very simplified step-by-step description of the procedure follows.
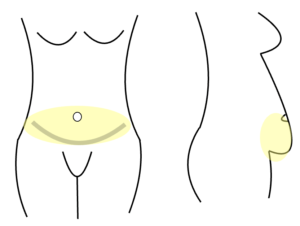
Here, the tissue that is typically removed during the tummy tuck is illustrated in yellow. Fortuitously, in most patients, the majority of the excess tissue is below the belly button as compared to above the belly button. This allows for favorable scar placement in the lower abdomen.
Removal of the excess tissue in the lower abdomen leaves a space that is filled with tissue from the top of the abdomen. The area where the excess tissue is removed is illustrated in pink. The tissue above the belly button is moved downward to fill in the space from the tissue removal.

The belly button is left attached to the abdominal wall in most patients, as seen in the image below.
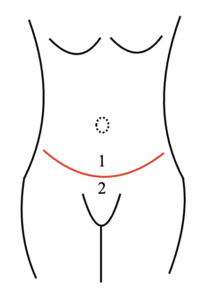
The top tissue, called a “flap,” is lowered to cover the open area created by the tissue removal. This maneuver tightens the external abdominal wall. The position marked “1” is now adjacent to the position marked “2.” At this stage of the procedure, the belly button is covered by the flap. The belly button is illustrated by the dotted circle below.
The belly button is then “inset” into the flap. An area of tissue is removed from the flap in the new location of the belly button. Anatomically, the belly button is generally in the same location as before surgery based on surrounding anatomical landmarks. The position of tissue removal and “insetting” of the belly button is illustrated in the image below in pink.
In the following image, the belly button is “advanced” (pulled into the flap) and held in position by sutures. When the belly button is “inset,” it is tightened to remove any loose skin that was caused by pregnancy, weight loss, or aging. The detailed steps of tummy tuck are explained in detail at the in-person consultation.
For more information about abdominoplasty or to schedule a consultation, please don’t hesitate to contact Stephen Herring, MD today. Dr. Herring is a board-certified plastic surgeon renowned for his personal approach to abdominoplasty. Whether you live locally or are traveling from out of town, he is happy to help!
Previous Post Next Post